Workshop Guide - Custom boards
This guide covers creating a custom board model using blender and an image editor. Since theres not many of us here at the moment, feel free to contact me at hgodden00@gmail.com for any help.
-1. Preface
NOTE: If you just want to make a simple board with image and some colours, you can do that in-game now!
Visit the Center Island's hut upstairs, or JC's woodshop.
0. Things you need
- Skaterift content is made using Blender. You can get
Blender from steam
NOTE:
The addon is designed for Blender version 3.6 4.2.
If using steam, you can
switch to this version using the 'Betas' option, and select 4.2 - Stable LTS
- GNU Gimp or similar image editor.
- Download the custom_board.zip
- An installed copy of Skaterift of course.
1. Installing exporter addon
Skip this step if you've already done it before. Guide on how to install the exporter addon for Blender
2. Configuring the template
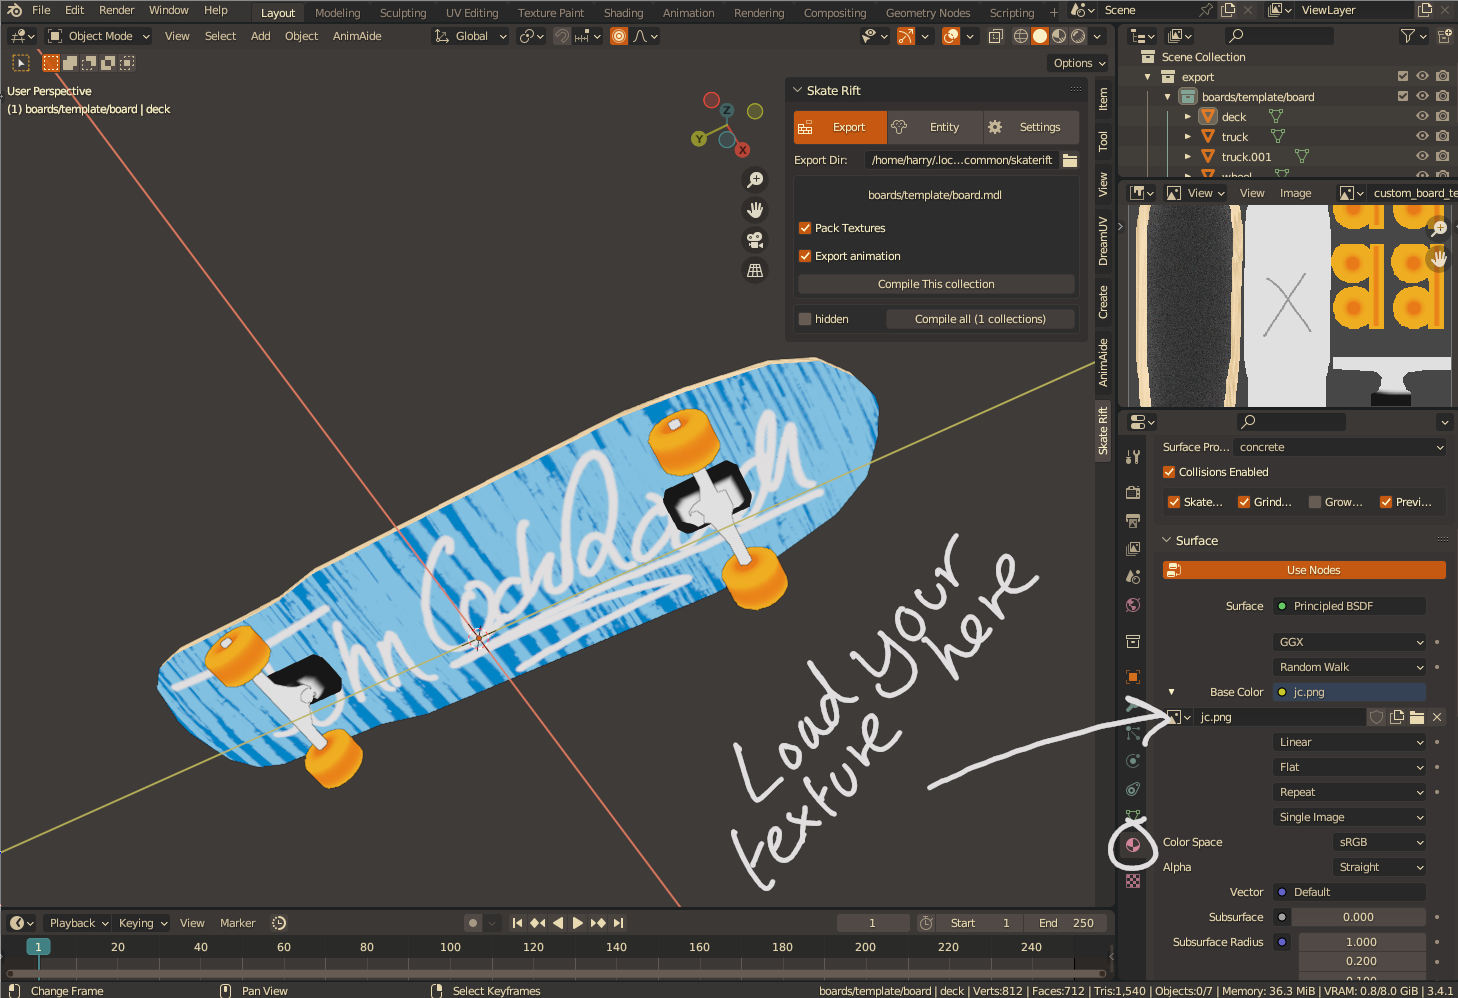
Firstly, Open the .blend file from the board_template zip.
Open the side panel in the 3D Viewport, and find the Skaterift tab, and in
that menu, the Export tab
Export Dir must be set to the game folder, which ends in
/steamapps/common/skaterift/
NOTE:
the path must have a / at the end, else things will break.
Wer're now setup to go, but an optional step here is to create one from
scratch. If you want to do this,
take a look at the detailed board specification for how to set it up.
If its your first one, you probably want to skip this step.
3. Edit the texture
Next step is to customize the artwork, in the template folder there is a
texture which you can edit. There is also the original .xcf file which you can
open using GNU Gimp, or a similar image
editor.

Now you can change the texture on the material to your own file, and see how
it looks in Blender.

4. Compile the model
In the Outliner panel in the top right, rename the collection name,
called boards/template/board.mdl. You should replace only the word
template. The collection name is the path it will export the
model, relative to the directory we set earlier.
Now in the Skaterift Export tab, press Compile This collection.
NOTE:
Blender will freeze for a second or so, since the export script has to
compress the texture file.
5. Test it out in-game
If everything is good, you should be able to visit the board shop and it
will be loaded in there. If not, try reopen it. If still not not, then
something broke, and there is no contingency plan here, sorry.
6. Upload via the Workshop tool
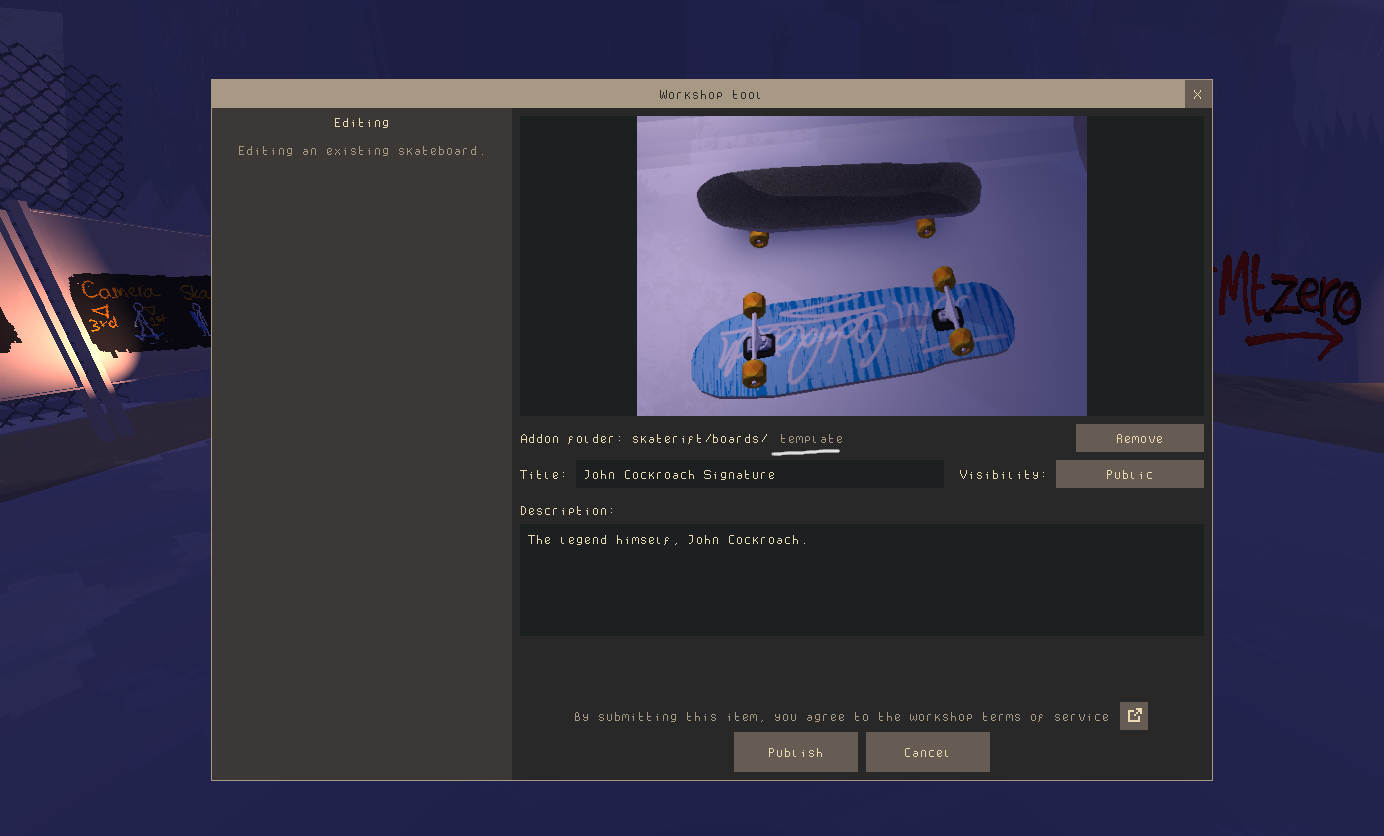
From the console of Skaterift (` button), you can open the workshop tool
by using the command: workshop_publish. From here, fill in the folder name
which houses the board. This is relative to the game folder just like the
export tool. You will know its correct when you see your board after
pressing the load button.

You can customize the preview by dragging around the image, left, right and
middle mouse buttons do different controls.
From here, just fill in the information like the title and description, and
press submit.